Trinket Pro Humidity and Temperature Sensor for Your Desk
So, I wanted to measure the temperature and humidity in my office. Typically, a simple hygrometer and thermometer could work. But, how do you log the information? Paper and pencil? What happens when I am away? So, in this project we wire up a small micro-controller, temperature and humidity sensor, screen, and a micro-SD card adapter to log the data. Then we use the 3D printer to make a nice little frame.
Parts:
Adafruit Pro Trinket – 5V
10k Ohm Resistors (3)
DHT11 basic temperature-humidity sensor
Small Prototype Boards
SainSmart IIC/I2C/TWI Serial 2004 20×4 LCD Module Shield For Arduino UNO MEGA R3
MicroSD card breakout board+
A small SD card
Jumper Wires
Old USB phone charger
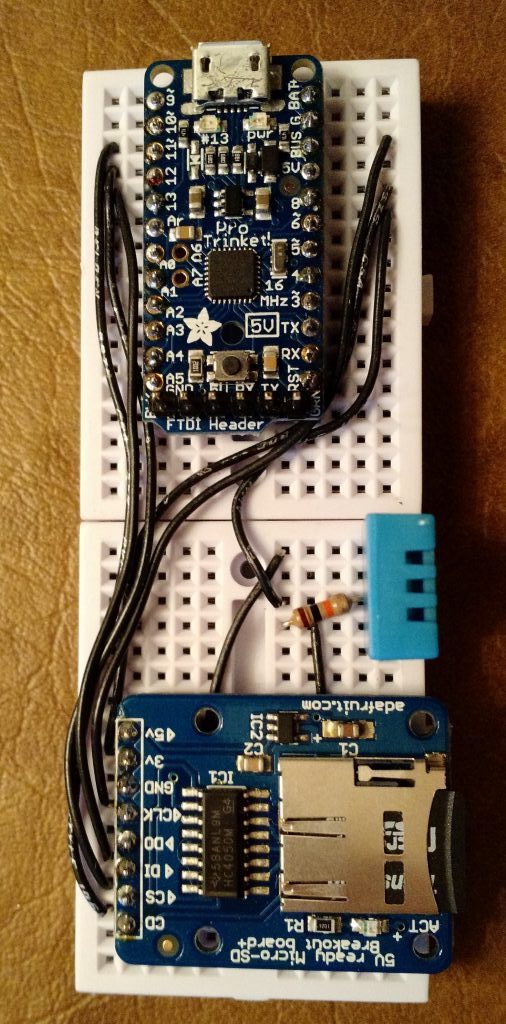
Step 1: Solder on the header pins to the trinket micro controller and SD card breakout board
 |  | 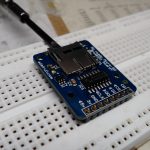 | 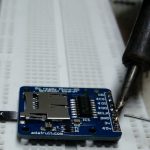 |
Step 2: Press the trinket, card board, and DHT into the prototyping board
 |  |
Step 3: Connections:
— Trinket Pin 10 to SD Card “CS”
— Trinket Pin 11 to SD Card “DI”
— Trinket Pin 12 to SD Card “DO”
— Trinket Pin 13 to SD Card “CLK”
— Trinket Pin “5V” to SD Card “5V”
— Trinket Pin “G” to SD Card “GND”
— Trinket Pin “5V to DHT Pin 1 (looking at it from the front Left pin is 1)
— Trinket Pin “GND” to DHT Pin 4
— Trinket Pin 8 to DHT Pin 2
— 10kΩ Resistor from Trinket “5V” to Trinket Pin 8 (this is a 5V digital pull-up)
— 10kΩ Resistor from Trinket Pin A4 (this is a I2C 5V pull-up, hidden under chip in photo)
— 10kΩ Resistor from Trinket Pin A5 (this is a I2C 5V pull-up, hidden under chip in photo)
— Cable from Trinket Pin A4 to Screen Pin “SDA”
— Cable from Trinket Pin A5 to Screen Pin “SCL”
— Cable from Trinket Pin “BUS” to Screen Pin “VCC”
— Calbe from Trinket Pin “G” to Screen Pin “GND”

Step 4: Write the software
The software needs to do 3 things:
a) collect temperature and humidity from DHT
b) Format and display the info on the screen
c) Save a copy to the SD card
Software Structure:
// Libs for the Screen (Need wire for I2C and Liquid Crystal to setup Display
#include <Wire.h>
#include <LiquidCrystal_I2C.h>
// Libs for Sensor (Provides sensor functions)
#include "DHT.h"

// Libs for SD card
#include <SPI.h>
#include <SD.h>

// Constants for Sensor
#define DHTPIN 8 // What digital pin we're connected to?
#define DHTTYPE DHT11 // Sensor Type

// Constants for SD Card
const int chipSelect = 10;

// Setup DHT sensor's connection pin and type
DHT dht(DHTPIN, DHTTYPE);

// Setup Screen Settings
// Set the LCD I2C address to 0x27
// It has 20 chars and 4 lines
LiquidCrystal_I2C lcd(0x27,20,4);

void setup() {
 lcd.init();          // Initialize the lcd
 lcd.backlight();     // turns off the backlight for effect
 lcd.setCursor(0,0);
 lcd.print("Initializing SD card...");

 // See if the SD card is inserted and can be initialized:
 if (!SD.begin(chipSelect)) {
 lcd.print("Card failed, or not present");
 // can't do do anything with it
 return;
 }
 lcd.print("card initialized.");  //Found the card!

dht.begin();  //Start the DHT functions
}

//Main program Goes HERE!
void loop() {
 // Wait a few seconds between measurements.
 delay(30000);

 // Clear the Screen
 lcd.clear();

 // Get humidity from Sensor and store as variable "h"
 float h = dht.readHumidity();

 // Read temperature as Celsius (the default)
 // Store temperature in variable "t"
 float t = dht.readTemperature();

 // Read temperature as Fahrenheit (isFahrenheit = true)
 float f = dht.readTemperature(true);

 // Compute heat index in Fahrenheit (the default)
 float hif = dht.computeHeatIndex(f, h);
 // Compute heat index in Celsius (isFahreheit = false)
 float hic = dht.computeHeatIndex(t, h, false);

 // Print info to the screen
 lcd.setCursor(0,0);  // Top Line
 lcd.print("Humidity: ") & lcd.print(h) & lcd.print(" %");
 lcd.setCursor(0,1);  // 2nd line
 lcd.print("Temp: ") & lcd.print(t) & lcd.print(" *C ");
 lcd.setCursor(0,2);  // 3rd line
 lcd.print("Temp: ") & lcd.print(f) & lcd.print(" *F ");
 lcd.setCursor(0,3);  // 4th line
 lcd.print("Heat Index: ") & lcd.print(hif) & lcd.print(" *F");

 // Make a string for assembling the data to save in log file
 // This a comma separated file that will look like this:
 // H = 10 %, T = 32 *F, T = 0 *C, HI = 12 *F
 String dataString = "";
 dataString += "H = " ;
 dataString += String(h);
 dataString += " %, T = ";
 dataString += String(f);
 dataString += "*F , T = ";
 dataString += String(t);
 dataString += "*C , HI = ";
 dataString += String(hif);
 dataString += "*F";

 // Open the file. Only one file can be open at a time
 // The file is or will be called datalog.txt
 File dataFile = SD.open("datalog.txt", FILE_WRITE);

 // If the file is open, you can write to it
 // You print the assembled string (called dataString) into the file
 // println command prints the string and moved down one line in the file
 // the next reading will be printed on the next line
 // then close the file and start all over again, go back to the top of loop code
 if (dataFile) {
 dataFile.println(dataString);
 dataFile.close();
 }
}

Step 7: Insert LCD into the Frame, stick on the control board


Step 8: DONE!